Tips and Tricks: 2-Up Printing
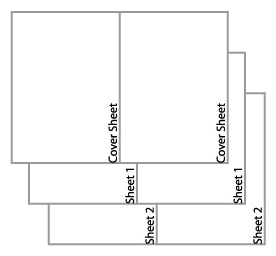
PlotWorks supports nesting or tiling of two or more images on each sheet. The following solution describes, as an example, how to print 10 sets of 30 images that are each 30 inches x 42 inches at 50% scale and nested 2-up on 30 inch bond.
 Add all 30 files to the Job Editor
- Change the Scale of the images
- Select the first file in the list
- Click on Properties and select the Output tab
- In the Scale By dropdown select Percentage
- Change the Scale to 50%
- Click Specify Final Media Size
- If your documents are landscape set the Final Width to 21 inches and set the Final Height to 15 inches
- If your documents are portrait set the Final Width to 15 inches and set the Final Height to 21 inches
- Click on the Output field for the first file so activate this field
- Select Edit > Copy Field Down to apply the Output Size and Scale to all images in the set. The keyboard shortcut CTRL + I may also be used.
- Change the copy count for the images in the job to 2
- Select the first file in the list
- Change the quantity field (Qty) to 2
- Select Edit > Copy Field Down to apply the quantity to all images in the set. The keyboard shortcut CTRL + I may also be used.
 Enable nesting
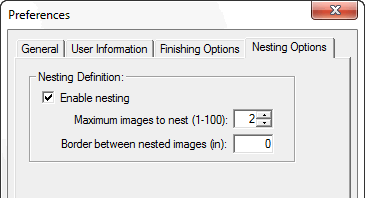
- Select Setup >Preferences then select the Nesting Options tab
- Enable Nesting and set Maximum images to nest to 2
- Set the Border between nested images to 0 then press OK
- Print the sets by using the following steps:
- Click Output
- Change the number of Sets to 5 then press OK
Always set the quantity column to the number of images that need to be nested. Set the quantity to 2 for 2-up printing, and set the quantity to 4 for 4 up printing.
Set the number of sets to the total number required divided by the number of images nested.

